Create and Edit Planograms
Overview
The Planogram Designer in CoolR Playbook enables users to create and edit planograms directly within the Master Data module. This centralized approach eliminates the need for external tools, streamlining planogram management and ensuring faster updates with enhanced control over product assortment layouts.
Access to planogram creation and editing is controlled through role-based permissions, maintaining secure and organized workflows across your organization.
Creating Planograms
Planograms can be created directly within the Master Data module using one of four supported methods, depending on your available data format and workflow preferences.
Supported Creation Methods
- Image Import (AI-Assisted)
- Manual Creation (Drag and Drop)
- CSV Upload
- JSON Upload
Method 1: Image Import (AI-Assisted)
Create planograms by importing an image of a cooler or cabinet. The system leverages AI-powered image recognition to automatically detect products and generate an initial layout.
Steps:
- Navigate to Master Data → Planograms
- Click Create
- Select Import via Image
- Upload a clear image of the cooler or cabinet
- The AI engine processes the image to:
- Detect products
- Identify product positions
- Generate an initial planogram layout
- Review the auto-generated planogram in the Designer
- Make any necessary adjustments
- Click Save
This method accelerates planogram creation when working from physical reference images.
AI-based product recognition may have a margin of error in product detection or placement. Review auto-generated planograms carefully and make necessary adjustments before saving.
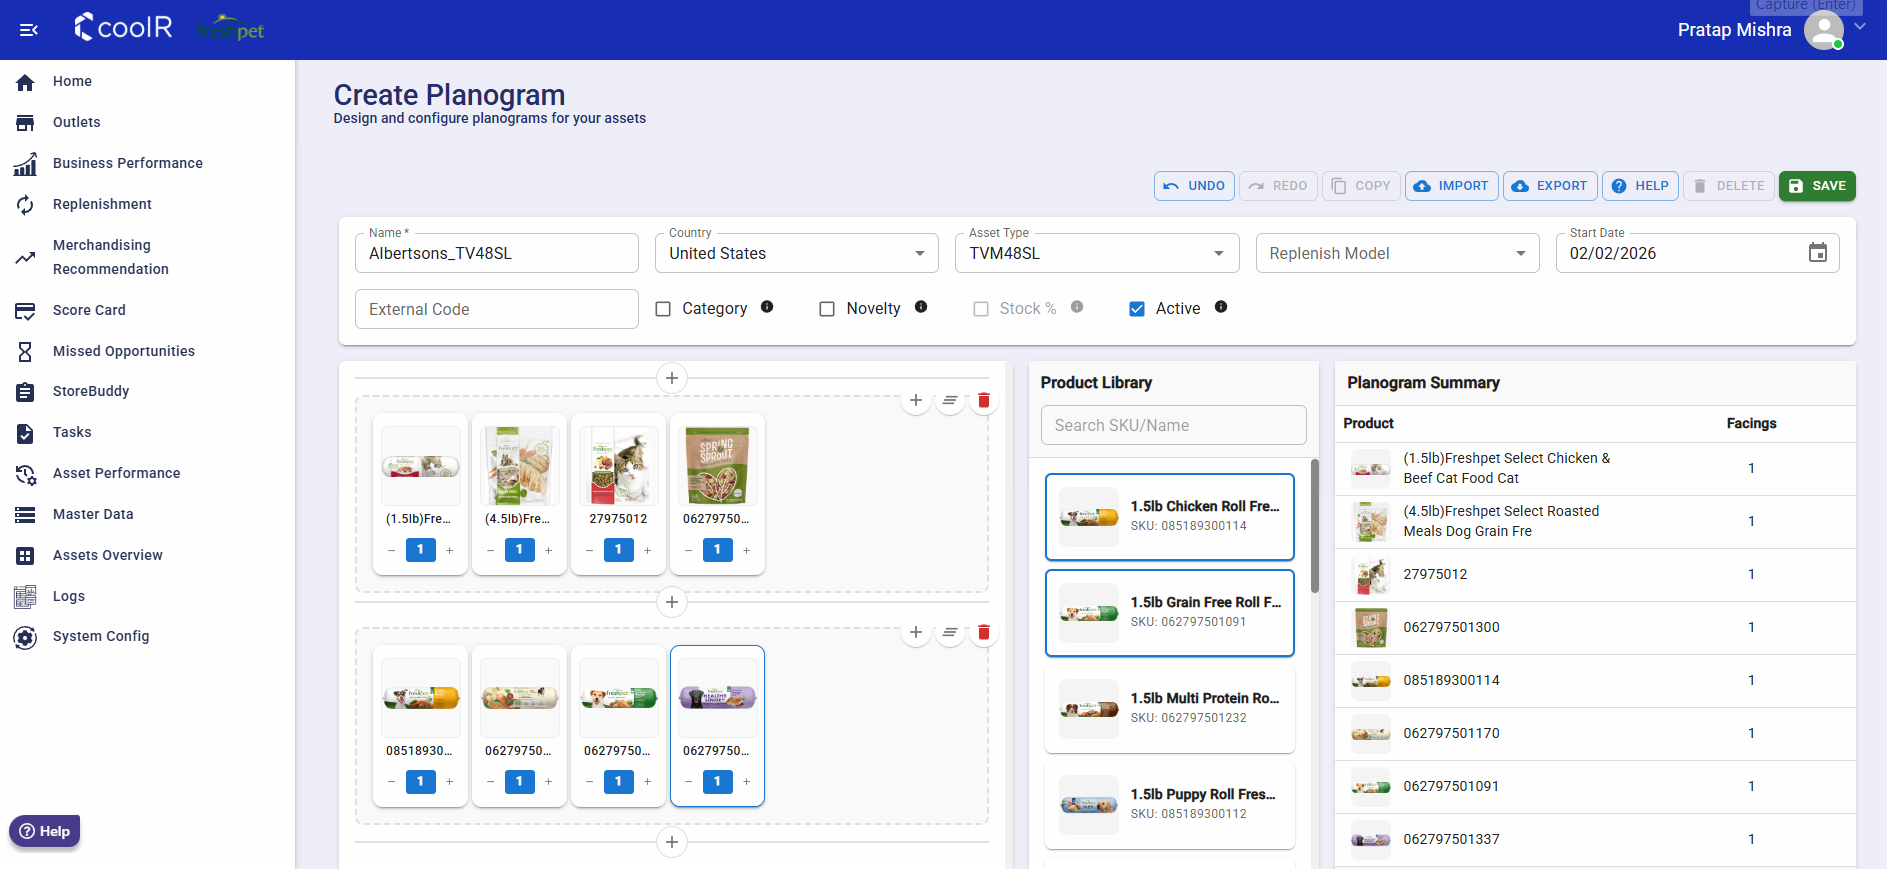
Method 2: Manual Creation (Drag and Drop)
This UI-driven method provides full visual control over planogram creation and is ideal for building layouts from scratch.
Steps:
- Navigate to Master Data → Planograms
- Click Create
- The Planogram Designer opens in create mode
- Drag products from the Product Library onto shelves
- Configure each product's:
- Facings
- Stack size
- Shelf placement
- Adjust the layout visually as needed
- Click Save
Method 3: CSV Upload
Upload planograms using a CSV file containing layout and product details. This method is useful for bulk operations or when planogram data is prepared offline.
Steps:
- Navigate to Master Data → Planograms
- Click Create
- Select Import via CSV
- Upload a valid CSV file following the required template format
- The system parses the file and generates the planogram layout
- Review the generated planogram in the Designer
- Click Save
Method 4: JSON Upload
Create planograms by uploading a JSON configuration file. This method supports advanced configurations and is typically used for system-driven integrations.
Steps:
- Navigate to Master Data → Planograms
- Click Create
- Select Import via JSON
- Upload a valid planogram JSON file
- The Planogram Designer loads the layout from the JSON data
- Review and make any visual adjustments if needed
- Click Save
Once saved, planograms become immediately available throughout Playbook wherever planogram data is utilized.
Exporting Planogram Data
To understand the expected file format for CSV or JSON imports, export existing planograms as reference templates. Exported files can be modified offline and re-imported to create or update planograms.
Export Process
- Navigate to Master Data → Planograms
- Select an existing planogram
- Click Export
- Choose the desired format:
- Export as CSV
- Export as JSON
- Download the file
The exported file reflects the exact structure required by the system for imports.
Modifying Planograms Using Exported Files
Exported planogram files can be modified offline and re-imported to either update existing planograms or create new ones.
Updating an Existing Planogram
Follow this process when modifying an existing planogram:
Steps:
- Export the existing planogram in CSV or JSON format
- Open the file and modify the required fields:
- Product SKUs
- Facings or stack size
- Shelf or position details
- Important: Keep the planogram name unchanged
- Import the updated file using Import via CSV or Import via JSON
The system will update the existing planogram with the new configuration.
Creating a New Planogram from an Existing Template
Follow this process to create a new planogram based on an existing layout:
Steps:
- Export an existing planogram in CSV or JSON format
- Modify the layout or product details as needed
- Important: Change the planogram name in the file
- Import the file using Import via CSV or Import via JSON
A new planogram will be created with the updated name and configuration.
Recommended Workflow
- Manual (Drag and Drop): Ideal for visual fine-tuning and creating layouts from scratch
- CSV Upload: Best suited for bulk edits or offline planogram preparation
- JSON Upload: Recommended for advanced configurations and system-driven integrations
- Image Import: Efficient for quickly creating planograms from existing cooler layouts
Using the Planogram Designer
The Planogram Designer provides intuitive controls for managing product placement and layout configuration.
Keyboard Shortcuts
| Action | Shortcut |
|---|---|
| Multi-select cells | Ctrl / Cmd + Click |
| Range selection | Shift + Click |
| Delete selected cells | Delete |
| Duplicate selected cells | Ctrl + D |
| Undo | Ctrl + Z |
| Redo | Ctrl + Y |
Designer Features
- Product Placement: Drag products from the catalog to any position on a shelf row
- Cell Selection: Click to select individual cells; use keyboard shortcuts for multi-select and range selection
- Reordering: Drag selected blocks to reorder or move products across rows
- Product Replacement: Double-click a product name in a cell to replace it using the dropdown selector
- Case Count Adjustment: Use + / - buttons to modify case counts
- Row Management: Use row icons to add facings, clear rows, or delete rows
- Shelf Management: Use + buttons between shelves to insert new shelves
Permissions and Access Control
Access to planogram functionality is managed through role-based permissions:
| Permission | Description |
|---|---|
| View Planogram | View planogram details and configurations |
| Create Planogram | Create new planograms |
| Edit Planogram | Modify existing planograms |
Create and Edit actions are hidden for users without the required permissions.
System Behavior
- Planogram creation and editing are available exclusively from the Master Data module
- Product stacking and orientation settings are preserved accurately
- Stack size values are validated before saving
- Changes take effect immediately upon saving
Last updated: February 2026