Warehouse Activation & Validation
Use Activation & Validation to activate and check an individual unit. Validation is optional and recommended: it takes longer but helps catch connectivity and device issues before deployment. For bulk activation, use Warehouse Activation.
Create activation records for the selected units in Playbook or Portal, either individually or by spreadsheet. This prerequisite applies to this workflow as well as bulk activation. See activation selection.
Follow what activation does and when to do it. Validation alone does not start the activation clock; activation performed in this workflow still has battery and subscription implications.
Layout
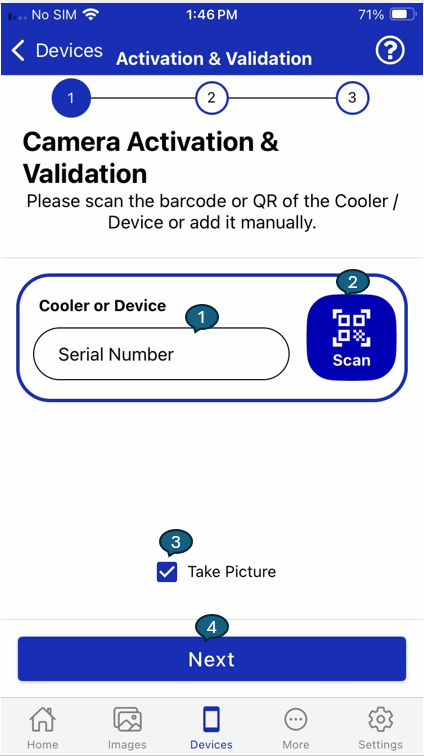
1. Serial Number
Users can enter the serial number of the asset or smart device manually, or scan it using the device's camera.
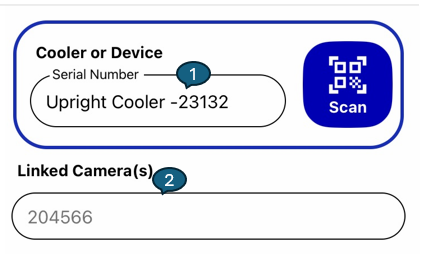
- If the serial number entered is for a smart device, the associated asset information will be automatically populated.
- If the serial number entered is for an asset, the linked smart device (camera) information will be automatically populated.
Fields:
-
Cooler or Device Serial Number: Enter or scan the serial number of the cooler or device to identify it in the system.
-
Linked Camera(s): Displays the serial number(s) of the camera(s) already linked to the selected asset or device, providing immediate visibility of existing associations.
2. Take Picture
If the "Take Picture" option is enabled, the app will prompt the user to capture a photo of the asset or device. This image serves as visual proof of the asset's condition and identity at the time of activation, supporting future audits and validation.
3. Next Button
After entering the serial number and (if required) taking a picture, the user taps the Next button. This action advances the workflow to the Camera Connection screen, where the device is connected and further configuration or validation steps are performed.
1. Camera Connection:
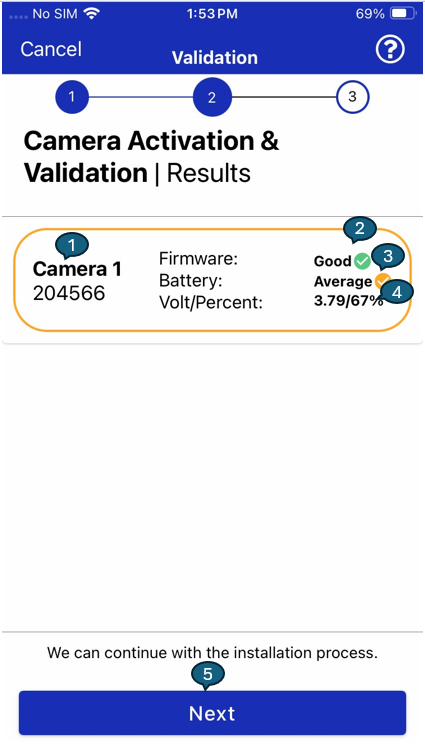
Displays detailed information about the connected camera, including:
1. Camera Serial Number:
Shows the unique identifier of the connected camera.
2. Firmware Status:
Indicates the current status of the camera's firmware.
- If the firmware needs an update, the app will prompt the user to initiate the update process.
- Once the firmware is successfully updated, the status will change to "Good".
3. Battery Health:
Provides information about the battery's condition (e.g., Average, Good).
4. Voltage / Battery Percentage:
Displays the current voltage and battery percentage of the camera.
5. Image Preview Prompt:
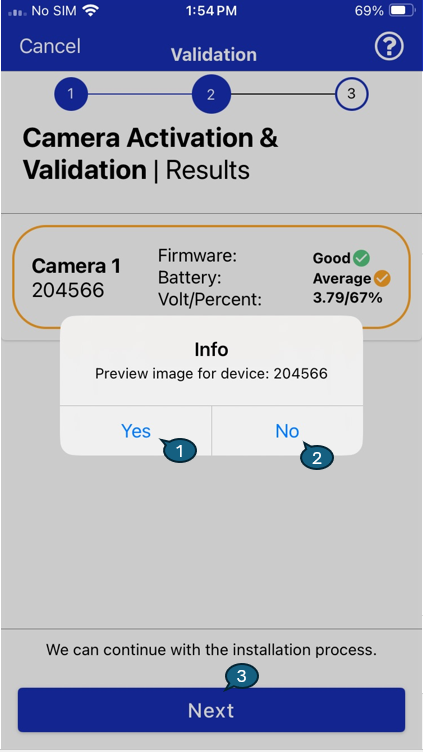
Displays detailed information about the connected camera, including:
| # | Option | Description |
|---|---|---|
| 1 | Yes | Preview the captured image. |
| 2 | No | Skip image preview and continue. |
| 3 | Next | Proceed to the next step in the workflow. |
2. Summary:
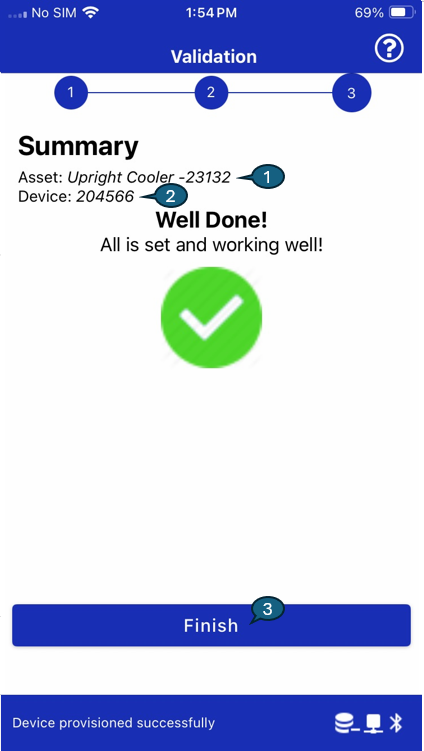
After successful camera connection and validation, the Summary screen confirms that the activation and validation process is complete.
1. Asset:
Displays the name or serial number of the asset (e.g., Upright Cooler -23132).
2. Device:
Shows the serial number of the linked smart device or camera (e.g., 204566).
3. Finish Button:
Tap Finish to complete the workflow and return to the main menu or next required step.
A green checkmark and "Well Done!" message indicate that all steps have been completed successfully and the device is provisioned and ready for dispatch and store assignment.