Installation Process
The VistaZ Installation Process consists of well-defined steps to ensure proper setup and configuration of the VistaZ device in retail outlets. The process is powered by the CoolR App, which facilitates device installation, asset management, and final verification.
Deployment paths
Use this page when the camera is installed at the store. For cameras installed before dispatch, use the Factory and Warehouse Setup Guide.
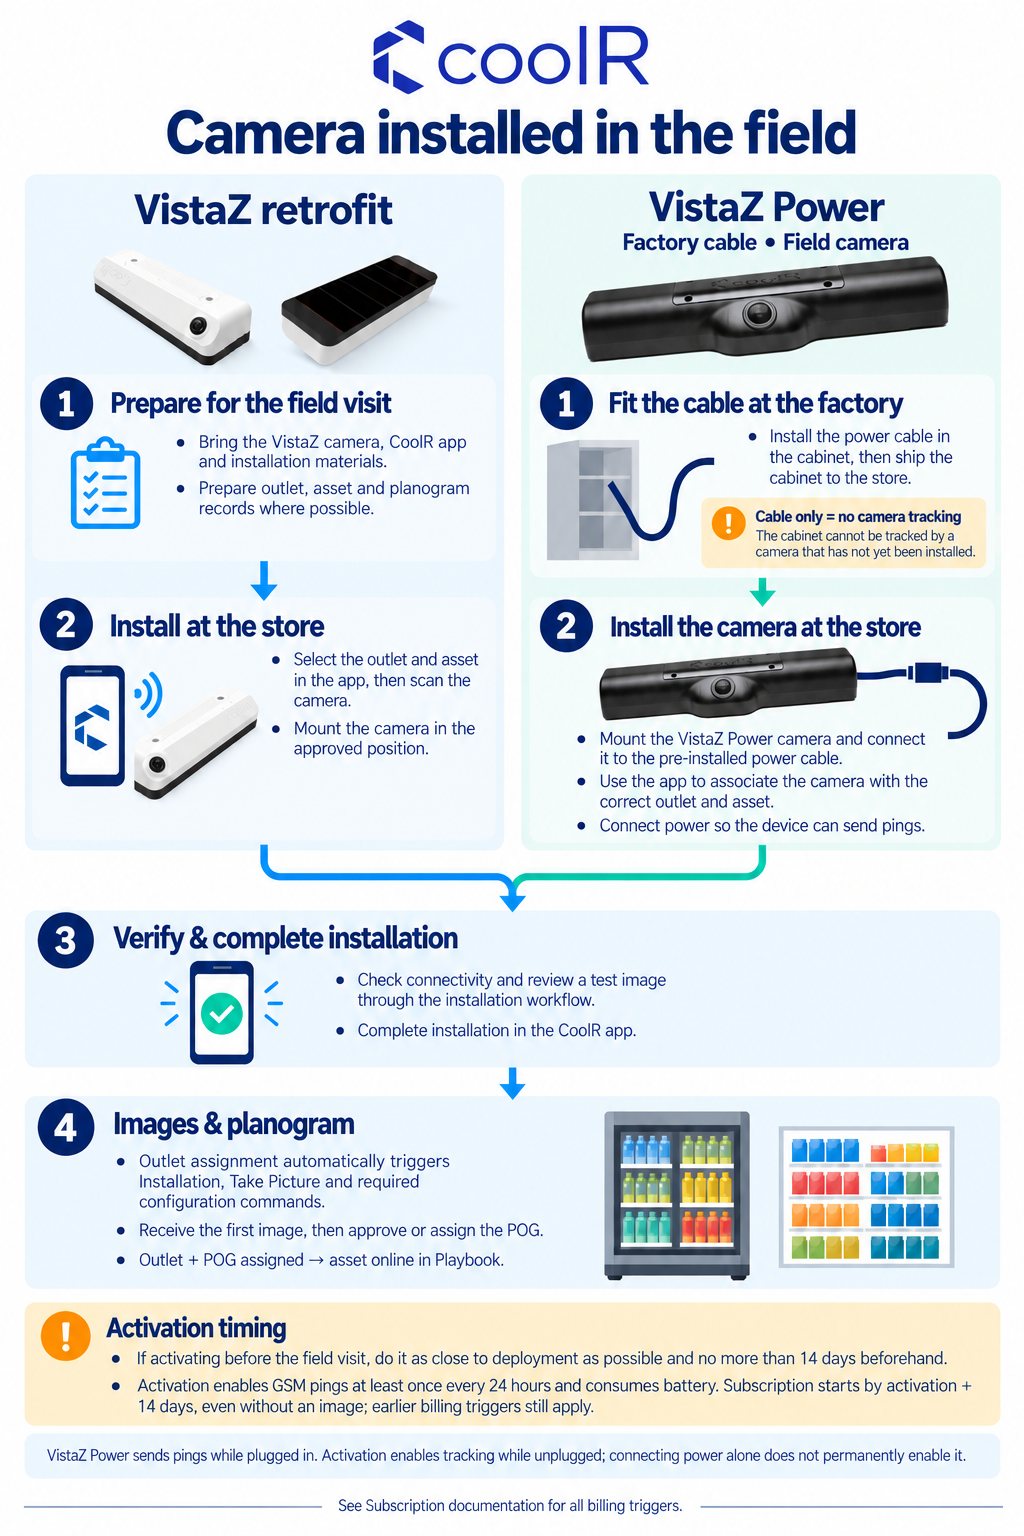
Select the infographic to view it at full size.
| Path | Before the field visit | At the store |
|---|---|---|
| VistaZ retrofit | Bring the camera, app and installation materials; prepare outlet, asset and POG records where possible. | Select the outlet and asset, scan and mount the camera, and complete the app workflow below. |
| VistaZ Power, factory-fitted cable | Fit the power cable at the factory and ship the cabinet. The cable alone provides no camera tracking. | Install the camera, connect it to the fitted cable, associate it with the correct outlet and asset in the app, connect power, and verify installation. |
If activating before deployment, follow the activation purpose and timing guidance. Activation enables daily tracking and has battery and subscription implications. VistaZ Power sends pings while connected to power; optional activation enables tracking while unplugged.
Outlet assignment automatically triggers Installation, Take Picture and required configuration commands. After the first image, approve or assign the POG. Both outlet and POG must be assigned for the asset to appear online in Playbook.
The mounting and app walkthrough below describes VistaZ retrofit installation. For VistaZ Power, use its approved mounting and cable instructions with the field sequence above.
Prerequisites & Installation Checklist
Before beginning the installation, ensure you have all required data, materials, and hardware.
Materials
- Glass cleaner - liquid/wipes
- VistaZ camera
- Mobile phone with CoolR app installed and credentials
- Review of installation guide
Master Data pre-entered (preferred but optional)
- Outlet data - outlet code, name, and address
- Asset data - cabinet serial number, model #, and planogram
- If Outlet, Asset, and Planograms are not entered beforehand, installation time may increase from ~5 minutes to ~10 minutes
- Device can be Prepared in advance before reaching the installation site, which helps speed up the connection process and ensures the device firmware is updated.
Refer to CoolR App installation
You can also review detailed documentation for CoolR mobile app for other features overview.
Installation Steps at Outlet
- Arrive and greet store owner/manager
- Get your equipment ready
- Map the camera to the asset using the app
- Check your asset template for the best camera location
- Clean and dry the surface before applying the camera
- Peel, stick, and hold the camera for 15 seconds
Select outlet
- From the App home screen, select the outlet where the camera will be installed.
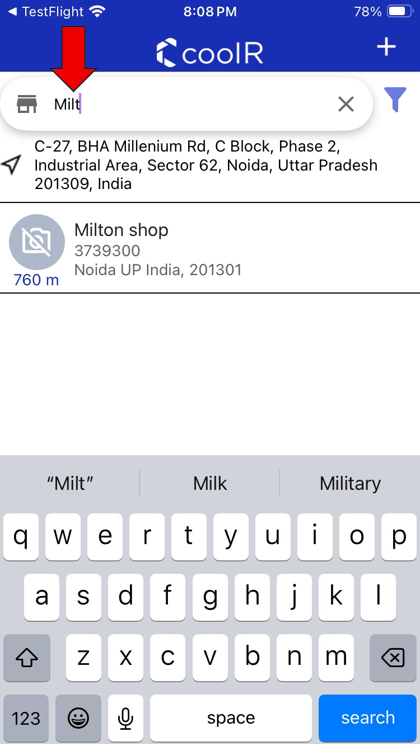
- App uses location to show the nearest location on the top.
- If the location is not visible, use the search functionality to find the location.
- If the location is not found, you can add the location. The "+" icon on the right side of the header allows you to quickly add a new outlet.
Select asset
- Choose the specific asset (e.g., cooler, display) to which the camera will be mapped. This ensures the camera data is associated correctly
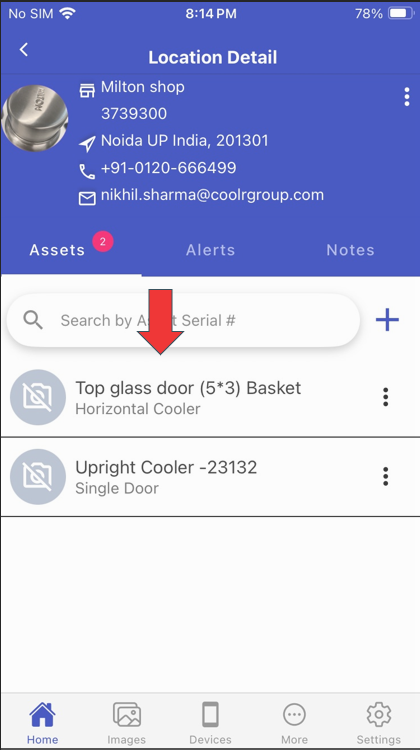
- If the Asset is not found, you can add the Asset. The "+" icon on the right side of the search bar allows you to quickly add a new Asset.
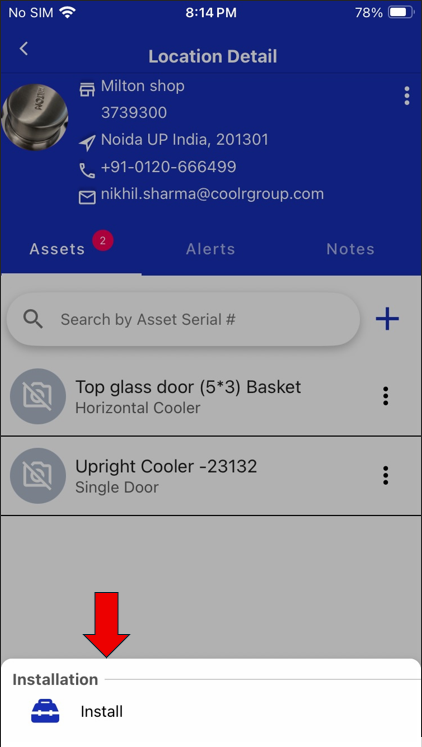
Select "Install"
- Once the Asset is selected, tap on the "Install" option which shows up at the bottom of the screen to begin the camera installation process for that outlet & Asset
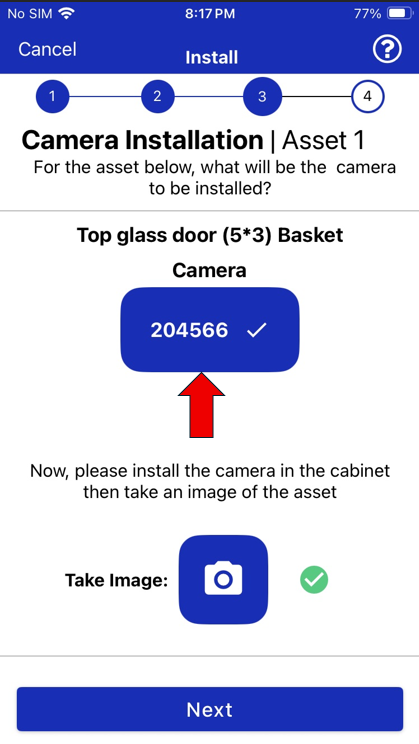
Select camera
- Use the app to scan the QR code or barcode on the camera.
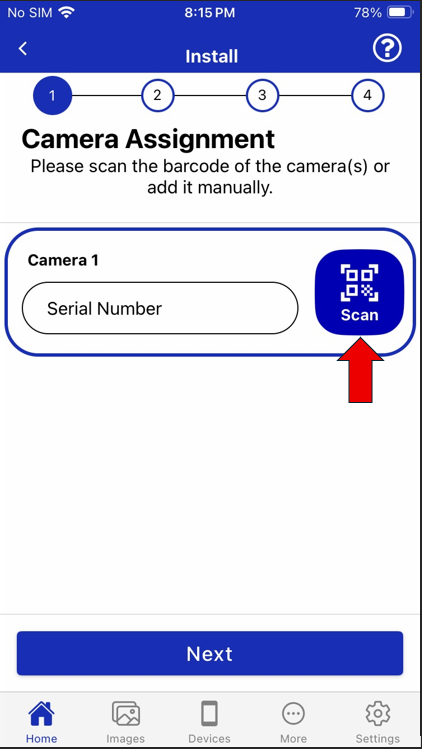
Alternatively, you can enter the camera's serial number manually
Pre-install verification
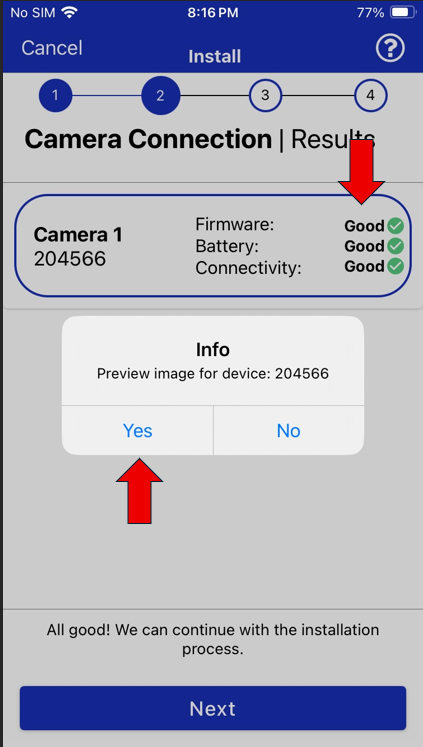
Check connection
- The app will verify the camera's connection status. Ensure there's good connectivity before proceeding. This step might take a few minutes.
- Once connection is verified, proceed to capture the test image by choosing "Yes" from the info pop-up.
Keep your mobile device within 2 meters (6.5 feet) of the VistaZ camera during installation to ensure a stable Bluetooth connection.
Preparation for mounting camera
To ensure a strong and lasting mount, clean the cabinet thoroughly:
- Use an alcohol wipe to clean the glass surface
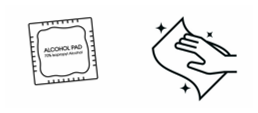
- Wipe with a towel to remove moisture and ensure it is completely dry

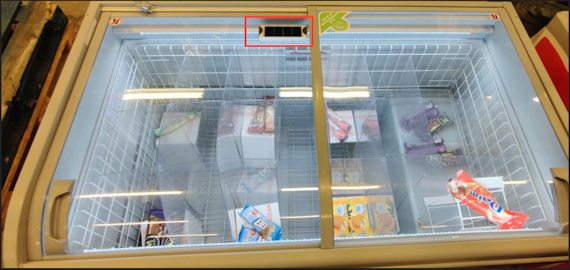
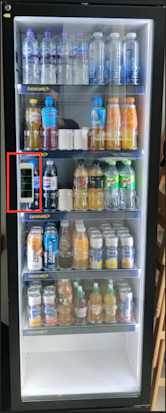
Identify install location
Refer to the provided cabinet templates to find the correct placement for the VistaZ inside the unit.
Horizontal/ Chest cabinets
Vertical/ upstanding cabinets
Install camera physically
- Make sure the lens is facing the products.
| For Left handle door | For Right handle door |
|---|---|
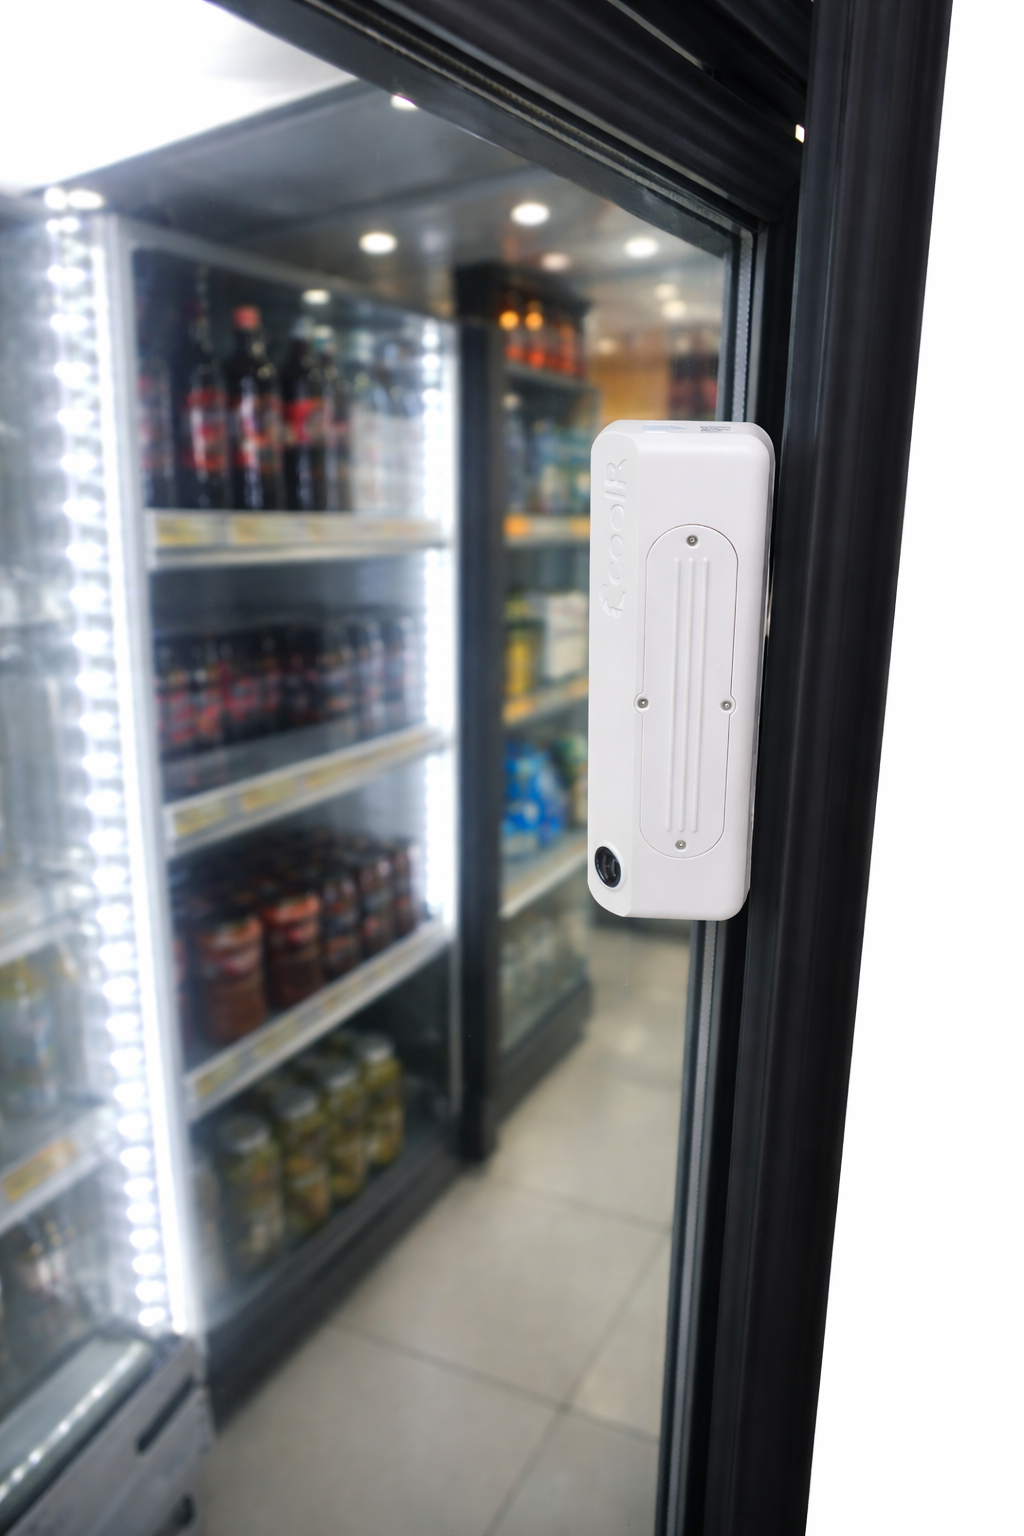 | 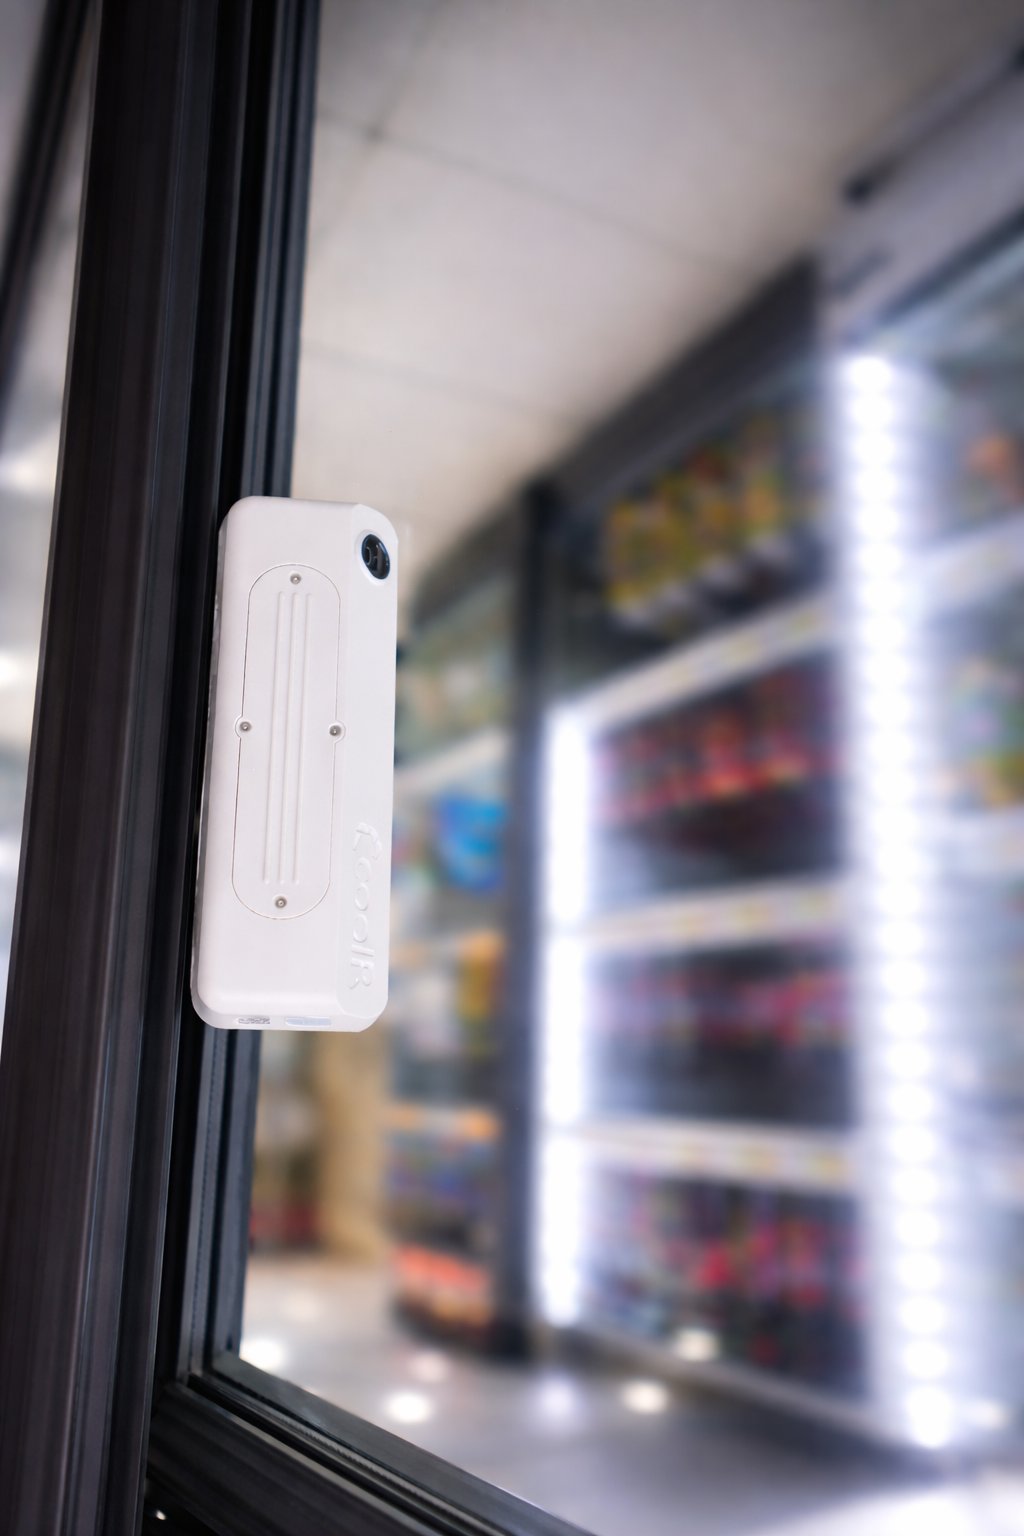 |
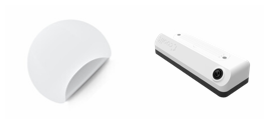
- Peel and stick the camera securely.
- Ensure the protection film is removed from the camera lens.
- Make sure the door is closed if installing on a vertical cabinet.
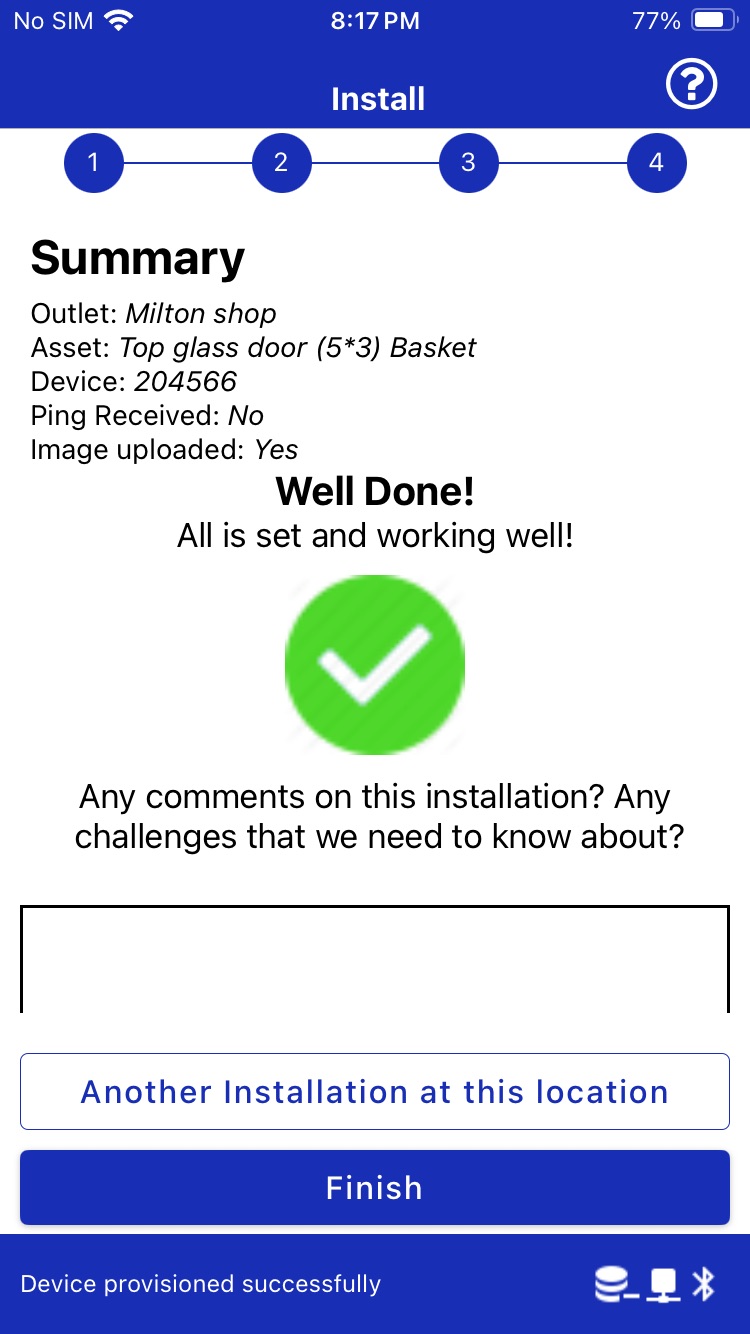
Finish installation
- Click "Next" to complete the installation
Troubleshooting
Camera not found?
- Navigate to Devices, choose Diagnostic/Configure, and initiate a scan using the same device serial number
- Use Bluetooth scanner apps to verify hardware availability
- iOS: BLE Scanner 4.0
- Android: BLE Scanner (Connect & Notify)
- If not resolved, contact support
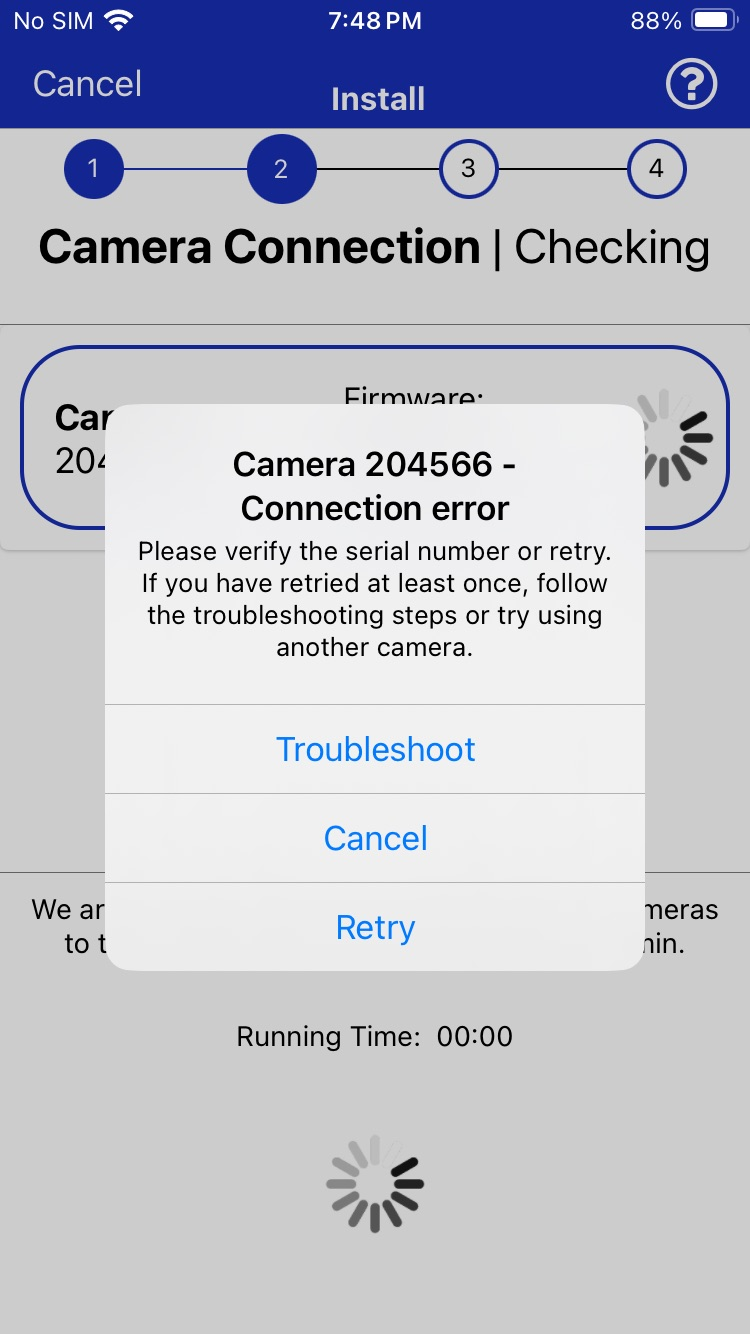
Poor connectivity/ No connectivity
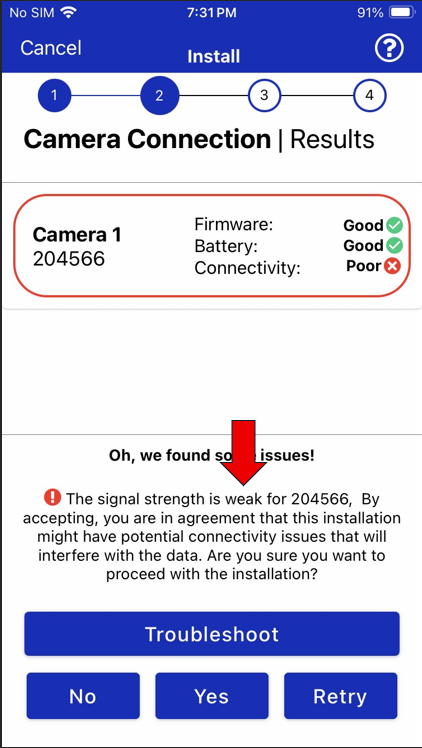
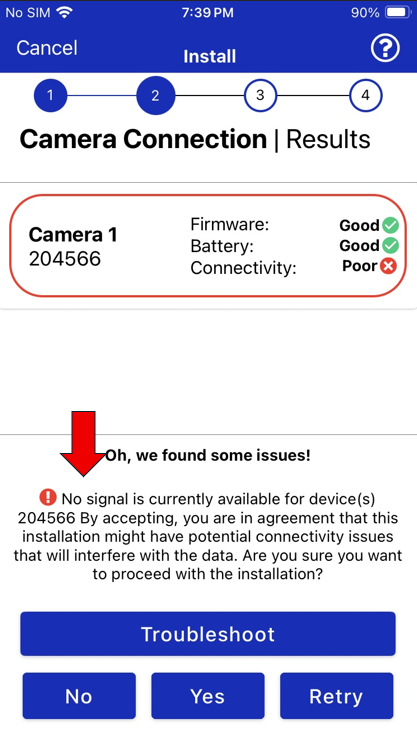
In some locations, you may not have cellular connectivity at all. In those cases, installation cannot be completed successfully.
In many locations, connectivity may initially take longer due to network provisioning processes at the cellular service provider end. In such cases, a couple of retries with a gap can help the installation.
It is recommended to retry the connection 2-3 times manually with a gap of 10-15 seconds.
As the CoolR camera units are installed inside the cabinet, there is some deterioration of signal between outside the cabinet and inside the cabinet.
If poor connectivity, you can still proceed with the installation.
In case of no connectivity even after 3 tries, it is recommended to contact support or not proceed with installation. Document the notes of the action taken.